Whether you’re managing a home server, running IoT projects, or simply experimenting with your Raspberry Pi, understanding how to navigate firewalls and establish an SSH connection is essential. This guide will walk you through everything you need to know, from setting up your Raspberry Pi to troubleshooting common issues. By the end, you’ll have a clear roadmap to securely connect via SSH to Raspberry Pi behind firewall Windows. Remote access to your Raspberry Pi opens up a world of possibilities. From automating tasks to monitoring systems, the ability to manage your device from anywhere is invaluable. However, firewalls often act as barriers, blocking unauthorized access to your network. While this is excellent for security, it can be a hurdle when you need to connect to your Raspberry Pi. Windows users, in particular, may face additional challenges due to differences in operating systems and configurations. But don’t worry—this article will provide step-by-step instructions, tips, and tools to help you bypass these obstacles safely. We’ll also explore advanced methods like port forwarding, SSH tunneling, and third-party services, ensuring you have multiple options to suit your needs. The importance of secure remote access cannot be overstated. Whether you’re troubleshooting your Raspberry Pi from the office or managing a project while traveling, knowing how to connect via SSH to Raspberry Pi behind firewall Windows ensures you’re always in control. This guide is designed to be beginner-friendly yet comprehensive enough for advanced users. By the time you finish reading, you’ll not only understand the technical aspects of SSH connections but also gain confidence in navigating complex network setups. Let’s dive into the details and unlock the full potential of your Raspberry Pi.
Table of Contents
- What is SSH and Why is it Important?
- How to Prepare Your Raspberry Pi for SSH Access?
- Why Does a Firewall Block SSH Connections?
- Step-by-Step Guide to Connect via SSH to Raspberry Pi Behind Firewall Windows
- How to Use Port Forwarding for SSH Access?
- What Are the Alternatives to Traditional SSH Connections?
- How to Troubleshoot Common SSH Connection Issues?
- Frequently Asked Questions About SSH and Raspberry Pi
What is SSH and Why is it Important?
SSH, or Secure Shell, is a cryptographic network protocol used to securely access and manage devices over an unsecured network. It provides a secure channel for data exchange, ensuring that sensitive information like passwords and commands are encrypted during transmission. For Raspberry Pi users, SSH is particularly valuable because it allows you to control your device remotely without needing physical access. This is especially useful for projects that require constant monitoring or updates, such as home automation systems, web servers, or IoT devices.
But why is SSH so important? The answer lies in its security features. Unlike other remote access protocols, SSH encrypts all data, making it nearly impossible for attackers to intercept or tamper with your connection. This is crucial when accessing your Raspberry Pi from outside your local network, as public Wi-Fi networks and the internet at large are often riddled with security risks. By using SSH, you can ensure that your connection remains private and protected from unauthorized access.
Read also:Innovative Ways To Achieve Slope Unblock Success
Key Benefits of Using SSH
- Encryption: All data transmitted via SSH is encrypted, safeguarding your credentials and commands.
- Remote Management: You can manage your Raspberry Pi from anywhere in the world, as long as you have internet access.
- Automation: SSH enables you to automate tasks by running scripts and commands remotely.
- Compatibility: SSH works across different operating systems, including Windows, macOS, and Linux.
How to Prepare Your Raspberry Pi for SSH Access?
Before you can connect via SSH to Raspberry Pi behind firewall Windows, you need to ensure that your Raspberry Pi is properly configured for SSH access. This involves enabling the SSH service, setting up authentication, and ensuring your device is connected to the internet. Let’s break down each step in detail.
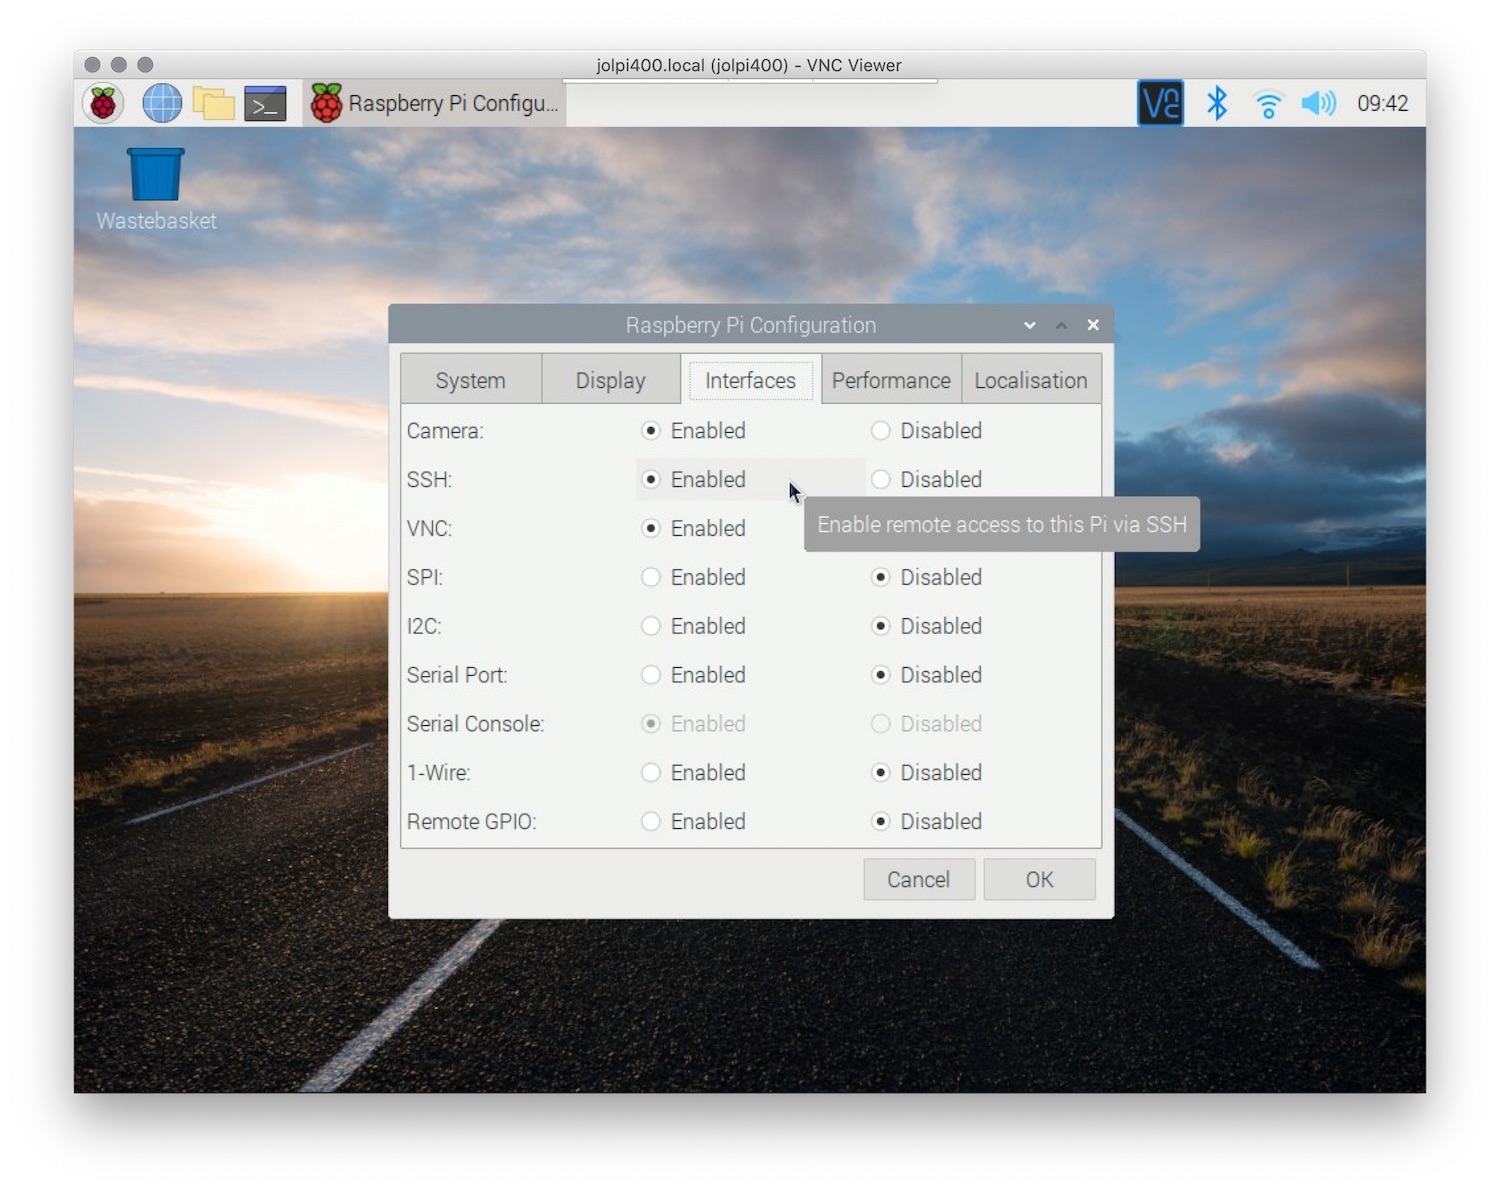
First, you’ll need to enable SSH on your Raspberry Pi. If you’re using a fresh installation of Raspberry Pi OS, SSH is disabled by default for security reasons. To enable it, you can either use the Raspberry Pi configuration tool or create an empty file named “ssh” in the boot partition of your SD card. Once enabled, your Raspberry Pi will be ready to accept incoming SSH connections.
Setting Up Authentication
Authentication is a critical aspect of SSH access. By default, Raspberry Pi uses password-based authentication, but for enhanced security, it’s recommended to use SSH keys. SSH keys provide a more secure and convenient way to authenticate, as they eliminate the need to enter a password every time you connect. To set up SSH keys, you’ll need to generate a key pair on your Windows machine using tools like PuTTY or OpenSSH and then transfer the public key to your Raspberry Pi.
Why Does a Firewall Block SSH Connections?
Firewalls are designed to protect networks by filtering incoming and outgoing traffic based on predefined rules. While this is essential for security, it can also block legitimate connections, including SSH. Understanding why firewalls block SSH connections is key to finding a solution that allows you to connect via SSH to Raspberry Pi behind firewall Windows.
Most home routers come with a built-in firewall that blocks external access to devices on the local network. This is done to prevent unauthorized users from gaining access to your devices. While this is a good security measure, it can be problematic if you need to access your Raspberry Pi remotely. The firewall may block the default SSH port (port 22), preventing you from establishing a connection.
How Firewalls Work
Firewalls operate by examining packets of data and determining whether they should be allowed or blocked based on rules. These rules can be configured to allow specific types of traffic, such as HTTP or FTP, while blocking others. For SSH, the firewall may block the connection unless you explicitly configure it to allow traffic on the SSH port.
Read also:Did Jay Leno Pass Away Unraveling The Truth Behind The Headlines
Step-by-Step Guide to Connect via SSH to Raspberry Pi Behind Firewall Windows
Now that you understand the basics, let’s dive into the step-by-step process of connecting via SSH to Raspberry Pi behind firewall Windows. This guide assumes that you’ve already enabled SSH on your Raspberry Pi and configured authentication. If not, refer to the earlier sections for instructions.
Step 1: Identify your Raspberry Pi’s local IP address. You can find this by running the command hostname -I on your Raspberry Pi. Step 2: Configure your router to allow SSH traffic by setting up port forwarding. Step 3: Use an SSH client on your Windows machine, such as PuTTY or Windows Terminal, to connect to your Raspberry Pi using its public IP address and the forwarded port.
How to Use Port Forwarding for SSH Access?
Port forwarding is a technique that allows you to bypass firewalls by redirecting incoming traffic on a specific port to your Raspberry Pi. This is a common solution for accessing devices behind a firewall. To set up port forwarding, log in to your router’s admin panel and configure it to forward traffic from the external SSH port to your Raspberry Pi’s local IP address and port 22.
What Are the Alternatives to Traditional SSH Connections?
If port forwarding isn’t an option, consider alternatives like SSH tunneling or third-party services such as ngrok or ZeroTier. These tools provide secure remote access without requiring complex router configurations.
How to Troubleshoot Common SSH Connection Issues?
Common issues include incorrect IP addresses, blocked ports, and authentication errors. Double-check your settings and consult your router’s documentation for guidance.
Frequently Asked Questions About SSH and Raspberry Pi
How do I find my Raspberry Pi’s IP address?
You can find it by running hostname -I on your Raspberry Pi.
Why is my SSH connection being refused?
This could be due to a blocked port or incorrect SSH configuration.
Can I use SSH without port forwarding?
Yes, by using tools like ngrok or ZeroTier.
In conclusion, mastering SSH connections is a valuable skill for anyone working with a Raspberry Pi. With the right setup, you can securely connect via SSH to Raspberry Pi behind firewall Windows and unlock its full potential.
For further reading, check out this official Raspberry Pi SSH guide.